Wet n Wild Mega Liner Glam Kat Eyes

#MOTD inspiration!

Yesterday, Americans all across the fifty states celebrated our independence day with a lot of bbq and fireworks. Its the unofficial, official start of summer, which is awesome!

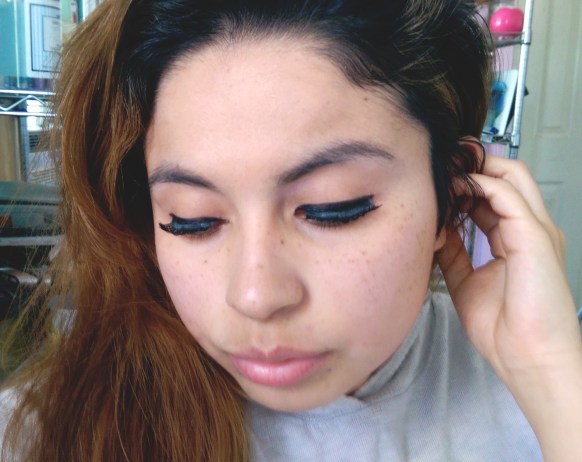
But the heat and humidity makes it unbearable to put on a full face without it literally melting off your face. For the rest of the summer, my strategy is to emphasize the eyes while being subtle and light on my skin so it’ll have enough room to breath. One easy way to create glam look is a sexy cat eye. The first step to getting it done perfectly (even if you’ve got to try a few times) is by finding a pointy tip liquid eyeliner. It will revolutionize the way the wings are applied and wear throughout the day. My personal favorite drugstore liquid liner, that is amazing for your budget and overall quality is the Wet n Wild Megaliner. The Megaliner collection has a variety of liner tips and colors to create the looks your heart desires.

liner6

The rundown of products I used for my eyes…liner11

liner12liner2liner5

Using the same Wet n Wild Megaliner, you can create the inner corner wings which just emphasizes the shape of your eyes beautifully. Then I used the Mega Eyeliner Pencil to trace my water line because the pencil is not as bold and looks more natural. Lastly, I applied some mascara and then curled them with my a curler so my lashes will stay up for longer. The Maybelline The Colossal Volum’Express is nice… but its not always consistent. Sometimes the mascara comes out clumpy and other times its smooth.

liner9

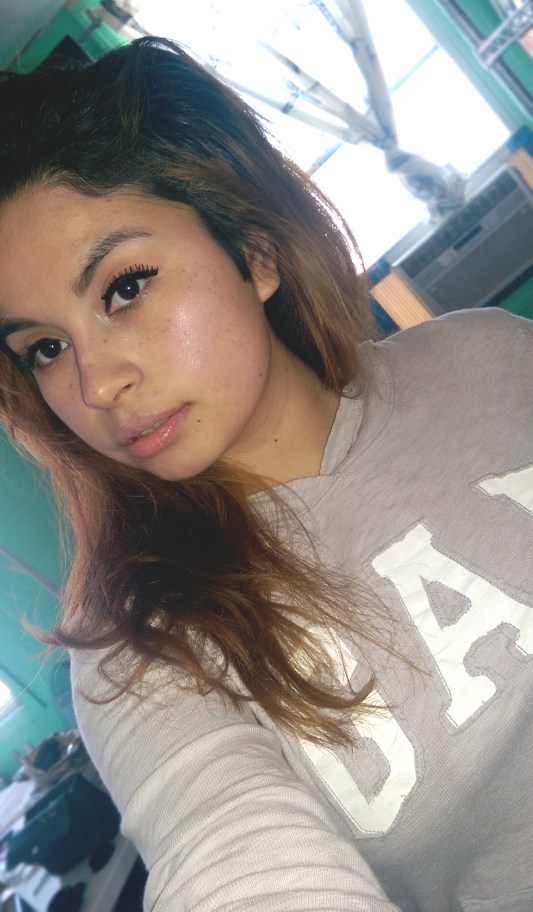
These are the products I used for my face. As you can see, I just focused on covering my under circles and set it with the Maybelline FIT Me! Powder so it’ll keep my face matte. By keeping the skin smooth and simple, it’ll  make the eyes pop even more.

liner8

liner7

I found these blending sponges at my local bargain store. I enjoyed how they’re all in different shapes and blend smoothly.

liner10

The Neutrogena 3-in-1 Concealer has been my go-to for everything. I found that using a flat shader brush makes the littlest drop of the concealer go a long way, which helps me save on quantitylinerliner4

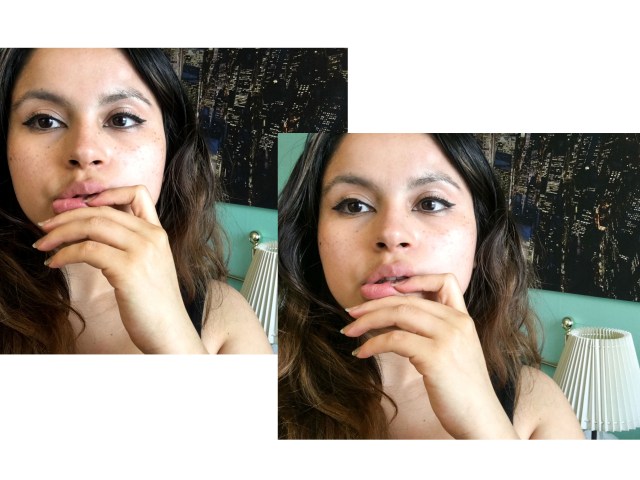
Thank you so much for checking out my post! I hope this look inspires you to try it out. Whats been your favorite liquid drugstore liner? Let me know in the comments below. Have a blessed day!

Metallic Green Liner #MOTD

IMG_9037

IMG_9108

greenliner5

greenliner3

greenliner2

IMG_9093

IMG_9095

greenliner9

greenliner12

greenliner6

greenliner1

greenliner

greenliner11

greenliner10

greenliner8

IMG_9088

Foundation:

I started with a clean face and then used the Aveeno Daily Moisturizer to give my skin some life. My favorite part of the moisturizer is the scent because its refreshing and airy yet it helps with the prevention of breakouts! Then I continued with my color correction and concealer to smooth out uneven tones. For the first time, I also played with the NYC Bronze Face Powder that my mother often uses. I was pleasantly surprised to see how much of a difference it made as a last touch to the foundation routine. It adds a bit of color to my complexion especially right after I finish applying concealer & foundation.

Lips:

Just a tab of tinted moisturizer and they were done 👍

Eyes:

The toughest part was getting the new eyelashes to get the shape of my eyes. Whenever you get a pair of faux lashes, the first thing before you wear them out is to break them in.. literally. It also helps to have a strong lash adhesive. Sadly, the one I’m currently using, the Revlon Precision Adhesive, works to a certain extent. I tend to apply the adhesive and then leave it for a few seconds to dry a little so it’ll become a bit sticky but what kept on happening was that the adhesive would dry almost immediately on the corners. When that’ll happen , it would take an extra 15 minutes longer just to make sure that the corners stayed put. So I’ll definitely be in the market for a new adhesive soon!

For the eyeshadows, I kept it very stubble & nude using the different shades shown in the Cast A Spell Beauty Book. For the next look, I’d probably add more eye shadow so it’ll be more noticeable.

The light green was the main touch. The light green liners from Milani Cosmetics and although it was a bit dry as I was reused it, the metallic color was still vibrant! I didnt have the heart to just throw it away cause I’d rather have it and not need it, then need it and not have it.

Anyways, I sincerely hope you enjoyed this look. Leave a comment to let me know how you would have used the green eyeliner differently and have a blessed day!

#MOTD w. Falsies

selfie 3

IMAG3472 copy

Wet n Wild Eyelashes 

selfie 2

wet n wild

Wet n Wild: Coverall Palette: I’ve been using the color correcting palette religiously, the colors even out my complexion and undertones, which is awesome. The only drawback is the white, which is meant for highlighting, its too shimmer… I like shimmer, but I was just expecting it to be matte.

eyebrow pencil (1)

selfie 4

foundation

selfie 1

The overall #Makeup Look!

Overall Review:

Lately I’ve been experimenting with false eyelashes & I recently bought these from Wet n Wild because I wanted some that looked fuller and longer… but be careful what you wish for. They looked great but they were a headache to put them on cause of how stiff they were and partly because I hadn’t handled wider & fuller lashes.

Color Correcting:

I started out with a clean face and after I applied sun screen and face moisturizer, I let it dry for a few seconds then started applying the color correcting. I’ve been getting in the habit of always using color correcting first because it evens out all the tones of my face. Especially my under circles, no matter how much sleep I get, they stay hallow.

Foundation:

Once I finished correcting, I began with concealer and then moved to apply foundation. The foundations I’ve been using, I got from as a gift through an internship with a beauty editor I did last fall. She had gone to a beauty convention in NYC and then brought back to me a bag full of makeup supplies and this foundation happen to fit my skin tone perfectly.

Eyelashes:

I then began to place the eyelashes on (which took longer then expected). The main culprit was my eyelash adhesive, from L’OREAL, I would let it dry for a few seconds so it’ll be a little stick and easier to apply. But the adhesive kept on drying out to quickly on the edges so it wouldn’t stay down on my corners..

It was a fun look to experiment with, once it was all done, the finished look was really nice to see and to start the day with. Enjoy!