Honestly, when I feel like crap 💩 I like to do my makeup. Whenever I’m feeling so overwhelmed with different tasks, to do lists, and the on going little details of managing motherhood, I try my best to take a few moments to touch up my a face. Even with just a little bit on, my mood instantly changes from indifferent to motivated and focused. Managing motherhood feels like a challenge every day because you’ve got to learn to balance your own personal needs and the very cautious efforts of parenting and those minutes of just “me time” can make the difference. This feeling is something completely new to me and I only started to really embrace it after I gave birth. This just makes me wonder how much different my attitude about my daily activities would have been if I’d started this routine earlier in life? Why hadn’t another women ever mentioned this and how come its not more commonly mentioned? I don’t feel selfish by taking that little bit of time to just focus on me and sometimes I feel like thats the only time I can get a few minutes with my own thoughts.
I’ve been steadily getting better at doing my own makeup by trying different things or a new technique every time I take up the challenge to apply it. For this look I put a little bit of eyeshadow along with a cate eye wing (which is something I’ve never tried doing cause eyeshadow kind of intimates me). From what I’ve noticed, a light hand is key as your applying it because it can easily start looking like a mess.
Here is a step by step of what I did & please, feel free to chuckle at the subtle humor of the commentary lol:
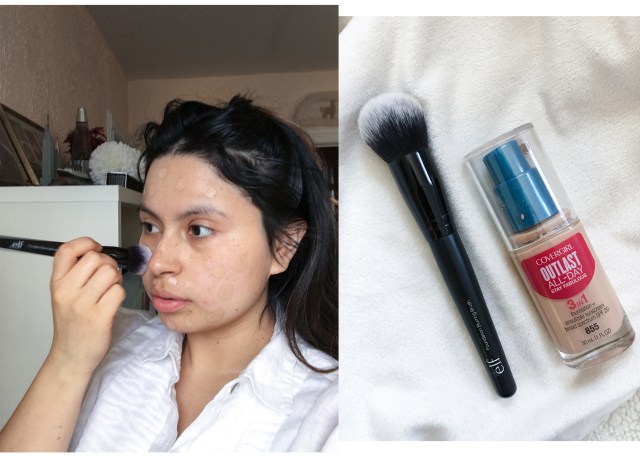
Step one: covering up my reptilian skin lol

Step two: using this awfully bad compact makeup as a under eye concealer because I needed to use it one last time so I won’t feel so guilty for throwing it out and wasting money on it.

Step three: blended well… from this distance you can’t notice the bumpy skin. i think i did a job well done. Now its time to set it with some powder to minimize my oily skin build up. hooray
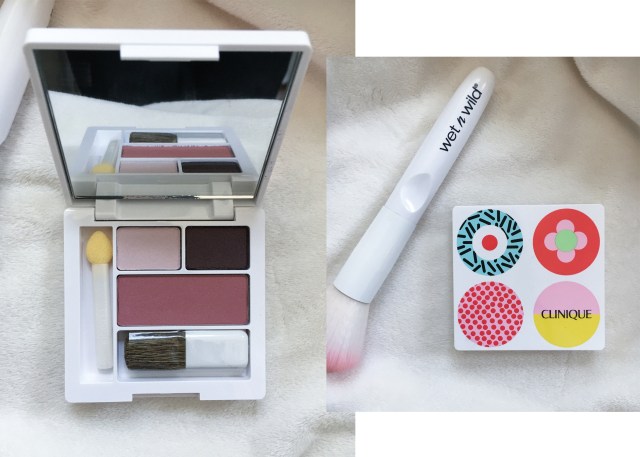
Step four: some eyeshadow because i hardly wear it and these are subtle enough for others to not notice how mediocre i actually am with makeup.

Step five: if i were in a stranded island, i would put a note inside a bottle asking for whoever reads the note to send me mascara and eyeliner… and some sunscreen cause no one wants to age prematurely Step six: a lip liner to overline my lips and as a lipstick cause my lips can make a desert look moist and plump

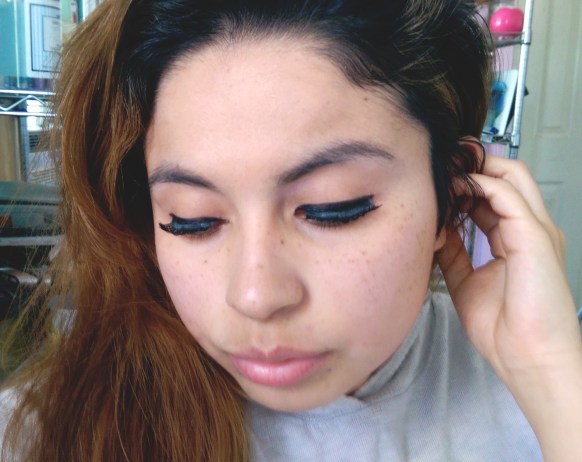
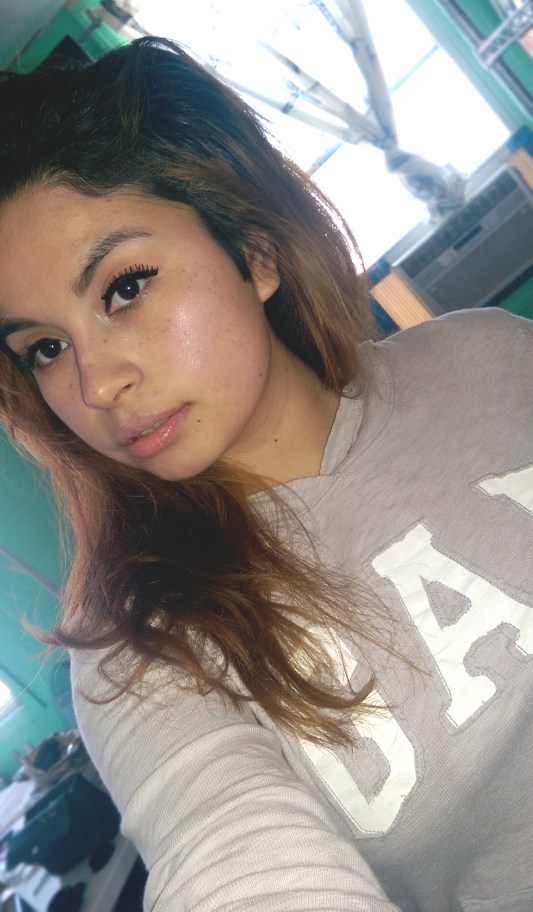
Voila mistro… not bad.

and another selfie to reenforce how naturally untalented I’m with makeup and girl, let me just say that if you know how to work your angles, no one will even notice lmfao!
Thanks so much for reading along and maybe even getting a little inspired by this faux easy makeup tutorial cause a girl tried her best! show some love on the comments and I hope you all have a blessed day.